NoCode GUI
The NoCode GUI allows you to execute in live the entire ML pipeline without any interaction with the backend software (in particular, you don't need to restart any process on the FPGA board, you just modify or compose your ML pipeline).
You only need to start the MuseBox server on your board with websocket protocol (depending on the task that you want to implement).
A little demonstration:
Getting started
The software runs on a web browser on your PC (Chrome or Firefox). You need NodeJS on your PC (https://nodejs.org/en/) and python (https://www.python.org/downloads/).
Just download the source code here:
https://github.com/MakarenaLabs/MuseBox-NoCode-GUI
and run these commands inside the root directory of the project:
npm install
python -m http.server 8000
The GUI will be available at address 127.0.0.1:8000 .
Top menu

On the top menu, there are 5 buttons:
-
save: save your current pipeline on the local storage of your browser
-
load: load your previous saved pipeline
-
download: download the pipeline as JSON file (if you want to use it on a custom client)
-
play/stop: start the pipeline or stop the pipeline
-
step: step to the next "frame" of the execution
Nodes
For adding a node on your current pipeline, click the right-click of the mouse. For customize a node, double-click on the node and a side menu will open.
Every node has a number of input and output, identified graphically with a name (string) and a point. You can connect the output of a node to the input of another node simply dragging a line from one "point" to another with the left button mouse.
For example, take a look at the "face detection" node:

This node has 2 inputs ("frame" and "person bounding box") and 3 outputs ("face bounding box", "post process", "logs"). Those input are typed, so you cannot connect those inputs with outputs that have a different type (the GUI prevent you to connect the unelegible nodes).
For example, a face detector takes in input an image and returns the bounding boxes. Those bounding boxes can be used by another task that can accept in input a bounding box (for example, the face landmarking).
For instance, this is an elegible connection:
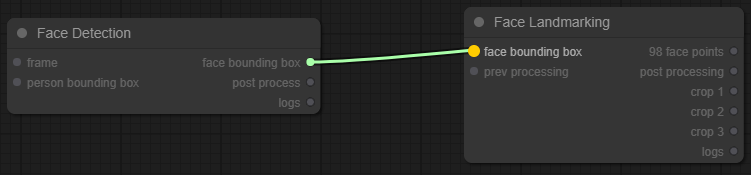
You can notice that the input of face landmarking node is blinking and it is selectable, so when you will release the mouse the link will remain between the 2 nodes.
Finally, this is a forbidden connection:
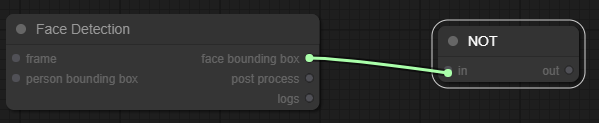
You can notice that the input of the "not" node is not highlighted, because it takes in input a boolean value, not a bounding box. So, when you will release the mouse, the link will disappears.
Startup
At the startup, the "configuration" node will appear on the top-left of the grid.
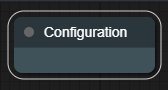
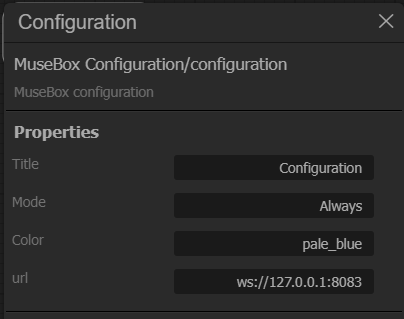
You can set the websocket url. At startup, the websocket url is setted as ws://127.0.0.1:8083.
If you are using the nocode GUI directly on the board, you can leave the websocket url as-is, meanwhile if you are using the GUI from your PC, simply replace the written IP with the board IP.
Node menu
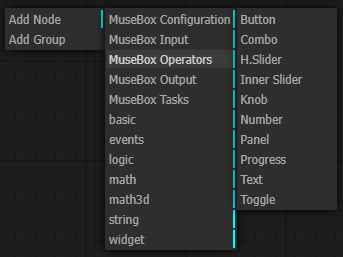
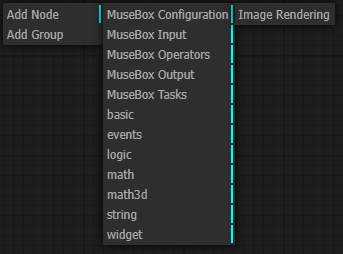
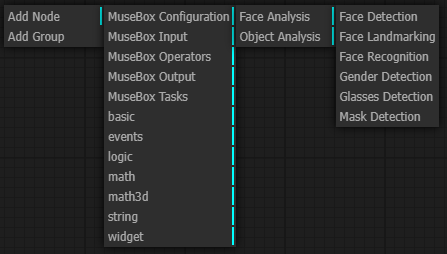
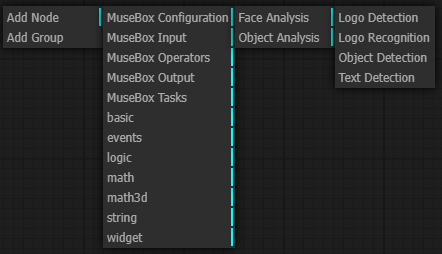
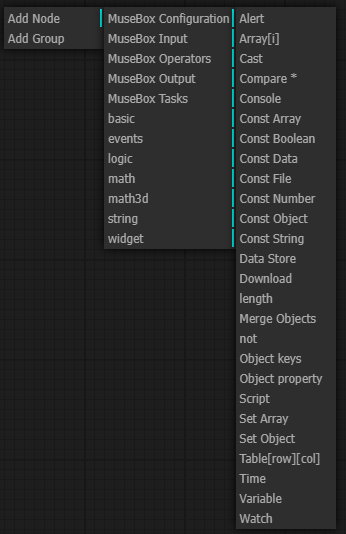
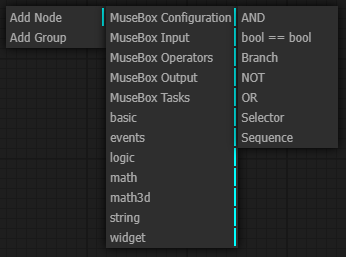
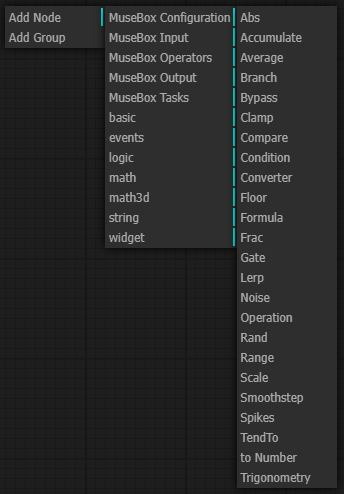
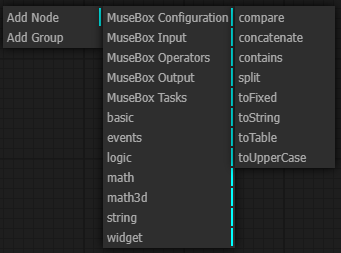
When you right click on the main grid, a node menu will open. You can select different kind of nodes according to your purpose.
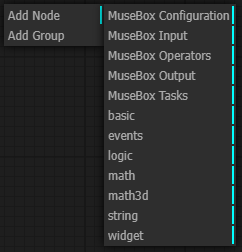
The node types are the following:
-
MuseBox Configuration: the configuration node
-
MuseBox Input: the possible input of the system
-
MuseBox Operators: operations useful for the pipeline (that runs on client CPU)
-
MuseBox Ouptut: the possible output of the system
-
MuseBox Tasks: machine learning task
-
basic: basic operations and variable useful for the pipeline
-
events: events generated during the pipeline
-
logic: boolean operations
-
math: mathematic operations (that runs on client CPU)
-
math3d: mathematic 3D operations ( that runs on client CPU)
-
string: string operations
-
widget: graphical widget for the pipeline (buttons, gauges, knobs, etc)
Node menu expansion
MuseBox input
MuseBox operations
MuseBox output
MuseBox Tasks:
Face analysis tasks
Object analysis tasks
Basic nodes
Events nodes

Logic nodes
Math nodes
3D Math nodes

String nodes
widget nodes