1. The board
Write the microSD card
The board starts from a microSD card. We do not ship the card: you use your own card of 16 GB or more and write on it the MuseBox image, which holds the operating system, the MuseBox AI Server and the built-in models. Writing the image erases everything on the card.
-
Download the image (about 3.5 GB), musebox_sdk_v1_9_0_mercury_pe3_hailo.img.
On your PC, Linux / macOS:
pc$ mkdir -p ~/musebox && cd ~/musebox
pc$ curl -LO https://s3.eu-central-1.wasabisys.com/musebox/SDK-RELEASES/IMG/musebox_sdk_v1_9_0_mercury_pe3_hailo.img
On your PC, Windows 10 / 11 (Command Prompt or PowerShell):
pc$ mkdir C:\Users\<your-user>\musebox pc$ cd C:\Users\<your-user>\musebox pc$ curl.exe -LO https://s3.eu-central-1.wasabisys.com/musebox/SDK-RELEASES/IMG/musebox_sdk_v1_9_0_mercury_pe3_hailo.img -
Put the microSD card in your PC (directly or with a USB card reader).
- Write the image on the card with balenaEtcher (free, for Linux, macOS and
Windows): Flash from file → choose
musebox_sdk_v1_9_0_mercury_pe3_hailo.img→ Select target → choose the microSD card → Flash!. Check the target twice: Etcher erases the disk you choose. At the end Etcher checks the card and ejects it.
Without Etcher, on Linux / macOS: dd
Find the card's device: run lsblk (Linux) or diskutil list (macOS) before and after inserting the
card; the new disk is the card, for example /dev/sdb on Linux or /dev/disk4 on macOS. Use the
whole disk, not a partition (/dev/sdb, not /dev/sdb1): the command erases it.
On your PC, Linux:
pc$ sudo umount /dev/sdb?*
pc$ sudo dd if=~/musebox/musebox_sdk_v1_9_0_mercury_pe3_hailo.img of=/dev/sdb bs=4M status=progress conv=fsync
On your PC, macOS:
pc$ sudo diskutil unmountDisk /dev/disk4
pc$ sudo dd if=$HOME/musebox/musebox_sdk_v1_9_0_mercury_pe3_hailo.img of=/dev/rdisk4 bs=4m
pc$ sudo diskutil eject /dev/disk4
The license is tied to the board and to the SD card (chapter 2): if you later write the image on another card, the board needs a new license.
Connect and power on
- Plug the Mercury+ MP1 SoM into the PE3 board.
- Plug the Hailo-8 module into its slot on the PE3, and secure it with its screw.
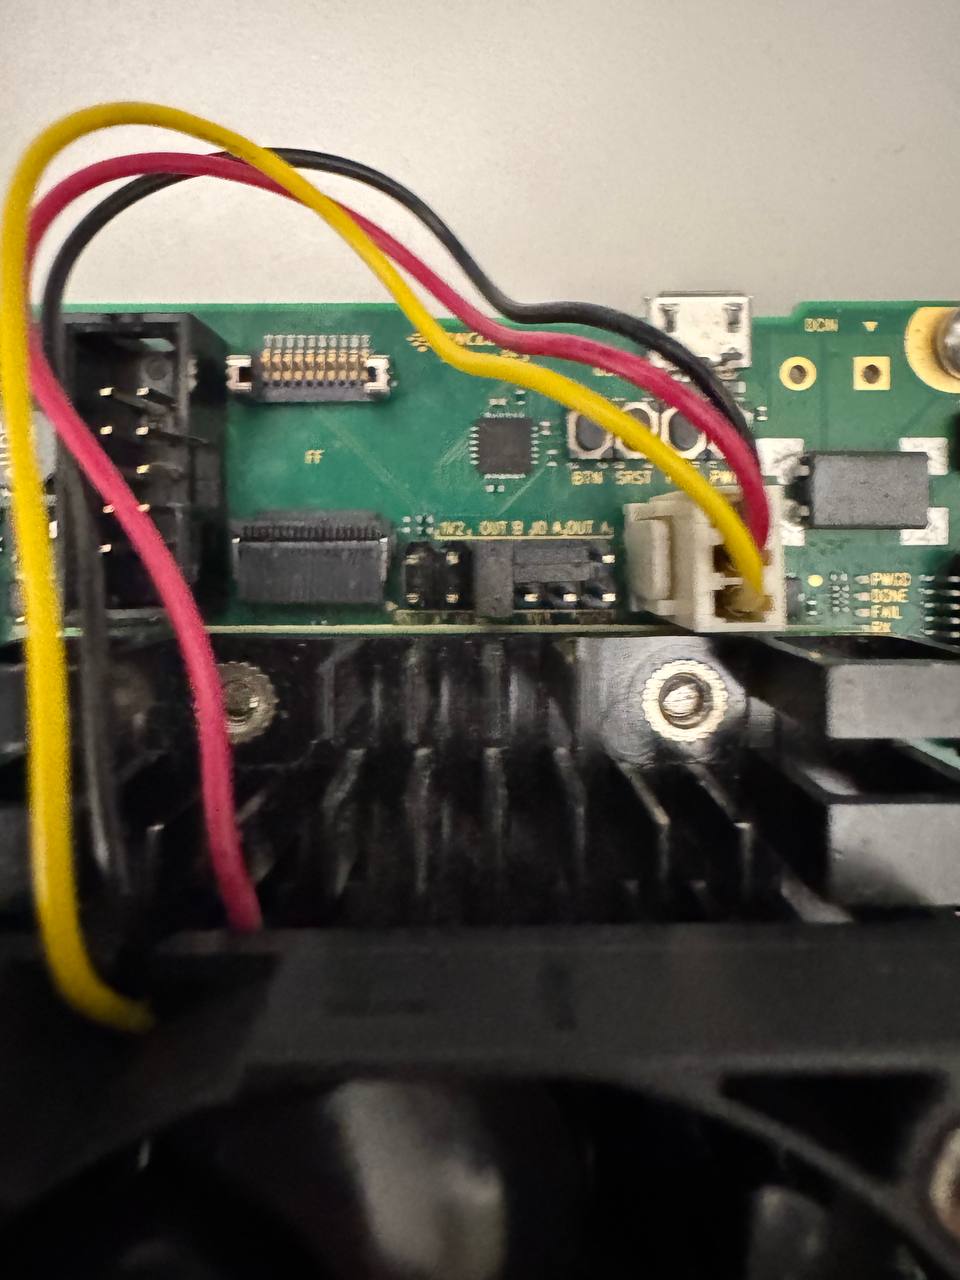
- Plug the fan cable (yellow, red and black wires) into the white 3-pin connector next to the power input.
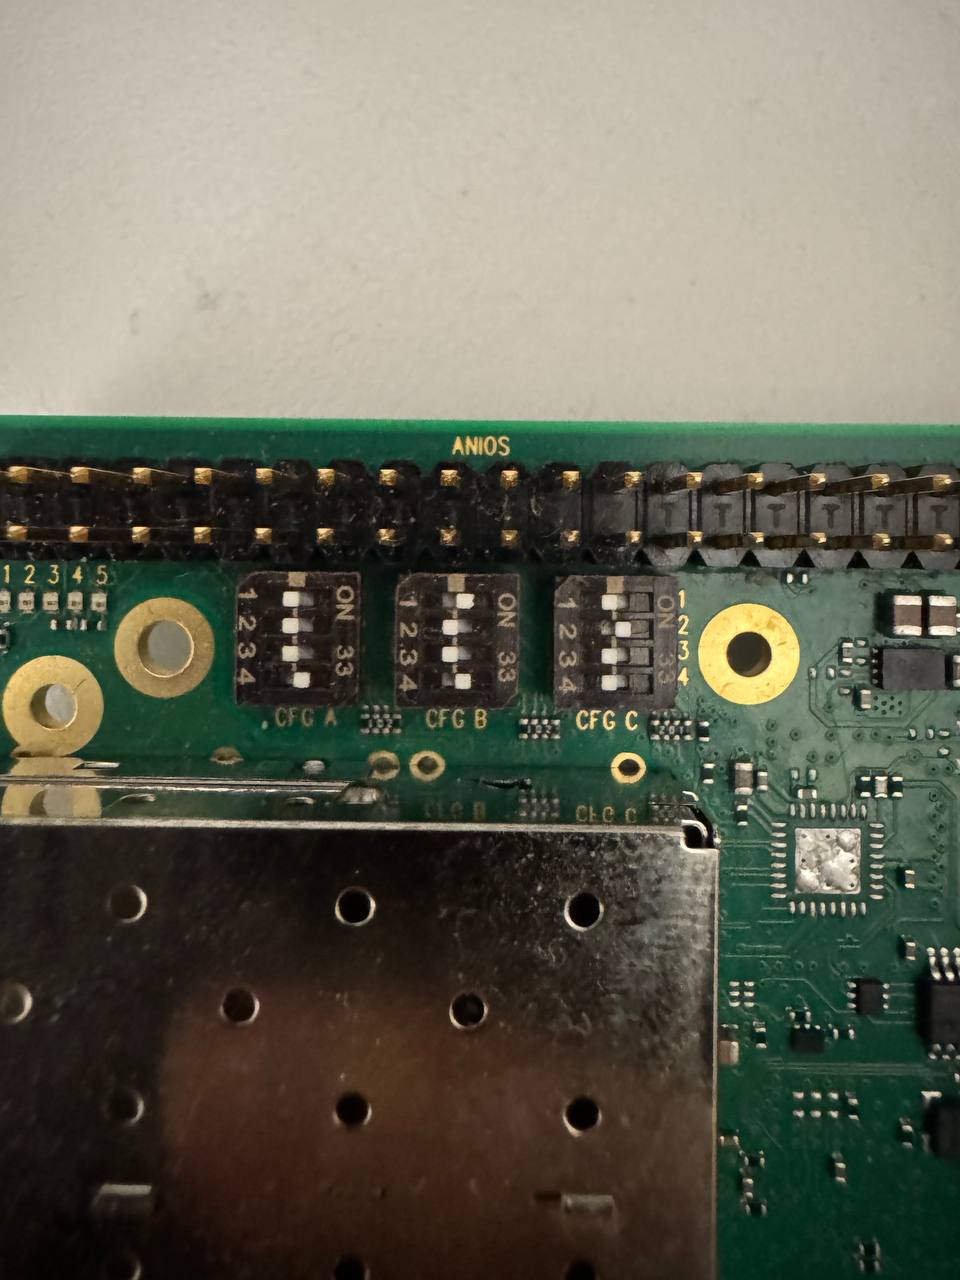
- Check that the CFG A, CFG B and CFG C DIP switches are set as in the photo below.
- Insert the microSD card with the MuseBox image (above).
- Connect the Ethernet cable to your network.
- Connect the power cable. The system needs about a minute to start.
- Optionally plug a USB camera into the board.
- Optionally connect the micro-USB port to your PC, for the serial console.
If the SoM, the Hailo module, the fan and the microSD card are already in place, start from step 6.
Find the board's address
The board gets its IP address from your router (DHCP). To find it:
- look at the list of connected devices in your router's page: the board's name is
mercury-mp1-pe3-hailo8(or similar); -
or ping the board by name from a PC on the same network.
On your PC, Linux / macOS:
pc$ ping mercury-mp1-pe3-hailo8.localOn your PC, Windows 10 / 11 (Command Prompt or PowerShell;
-4shows the IPv4 address):pc$ ping -4 mercury-mp1-pe3-hailo8.localThe address is in the first line of the answer, for example
PING mercury-mp1-pe3-hailo8.local (192.168.1.50)on Linux / macOS orPinging mercury-mp1-pe3-hailo8.local [192.168.1.50]on Windows. On Linux / macOSpingdoes not stop by itself: when you have the address, press Ctrl+C in the same terminal on your PC to stop it.Recorded on the Mercury+ PE3 Hailo-8 (Mercury+ MP1 SoM)
Coming soon.
Coming soon.
Coming soon.
Coming soon.
In the rest of this tutorial <board-ip> is that address (for example 192.168.1.50).
Serial console (optional)
If you cannot find the board's address, or cannot log in over the network, you can reach the board through its serial console.
Connect the micro-USB port of the board to the PC and open a serial terminal at 115200 baud, 8N1 (8 data bits, no parity, 1 stop bit, no flow control).
The board's USB port is an FTDI converter with two channels, A and B: the console is on channel B.
- On Linux it appears as two devices,
/dev/ttyUSB0and/dev/ttyUSB1: use the second one, for examplescreen /dev/ttyUSB1 115200. - On Windows it should appear as one or two USB Serial Port (COMx) entries under Ports (COM & LPT) in Device Manager. If there are two, use the one with the higher COM number, for example with PuTTY (connection type Serial).
Log in as root (no password):
Windows shows USB Serial Converter A and B, but no COM port
The FTDI converter is detected, but its virtual COM port (VCP) is disabled. To enable it:
- Open Device Manager → Universal Serial Bus controllers → USB Serial Converter A → Properties → Advanced, and tick Load VCP.
- Do the same for USB Serial Converter B, if the option is there.
- Disconnect and reconnect the micro-USB cable.
The USB Serial Port (COMx) entries now appear under Ports (COM & LPT).
Coming soon.
Coming soon.
Coming soon.
Coming soon.
Log in
On your PC, Linux / macOS:
pc$ ssh root@<board-ip>
On your PC, Windows 10 / 11 (Command Prompt or PowerShell):
pc$ ssh -m hmac-sha2-256-etm@openssh.com root@<board-ip>
On Windows the plain ssh command does not connect: the Windows ssh has to be told which integrity
algorithm (MAC) to use with the board, hence -m hmac-sha2-256-etm@openssh.com.
The first time, ssh asks whether you trust the board (Are you sure you want to continue connecting?):
type yes and press Enter. The root user has no password: you are logged in straight away, and the
prompt changes to the board's one. Commands marked On the board run in this terminal.
Windows: set up ssh for the board once
scp and mbx-compile (chapter 6) also connect to the board, and on Windows
they do not work without the setting above. Set the algorithm once for all of them: on your PC, create
the file C:\Users\<your-user>\.ssh\config (the .ssh folder too, if it does not exist) with:
Host <board-ip>
    User root
    MACs hmac-sha2-256-etm@openssh.com
If you use Notepad, choose Save as type: All files and type the name config: otherwise Notepad
saves config.txt, which ssh ignores. Replace <board-ip> with your board's address. From then on ssh root@<board-ip> and scp work as
on Linux and macOS.
To log in from Windows, PuTTY works too.
The MuseBox files are in /root/musebox-ai-servers:
/root/musebox-ai-servers/
├── musebox-ai-server-cpp/musebox-ai-server   the AI server, C++ program (chapter 3)
├── musebox-ai-server-python/                 the AI server, Python package (chapter 3)
├── ai_models/                                built-in models, and yours (chapter 6)
└── config/                                   settings (*.json) and license.lic
The board is ready. Before the AI server can start, the board needs its license: that is the next chapter.